Building a standalone IPA keyboard: Part 2 - The Design
Right, to recap the aims covered in my first post, I want to build a small keypad programmed to type IPA symbols, to supplement my regular QWERTY keyboard.
The hardware
How many keys should there be? Obviously there’s a sweet spot here: too few keys and I have to remember too many shortcuts; too many and I the keypad becomes huge and needlessly expensive.
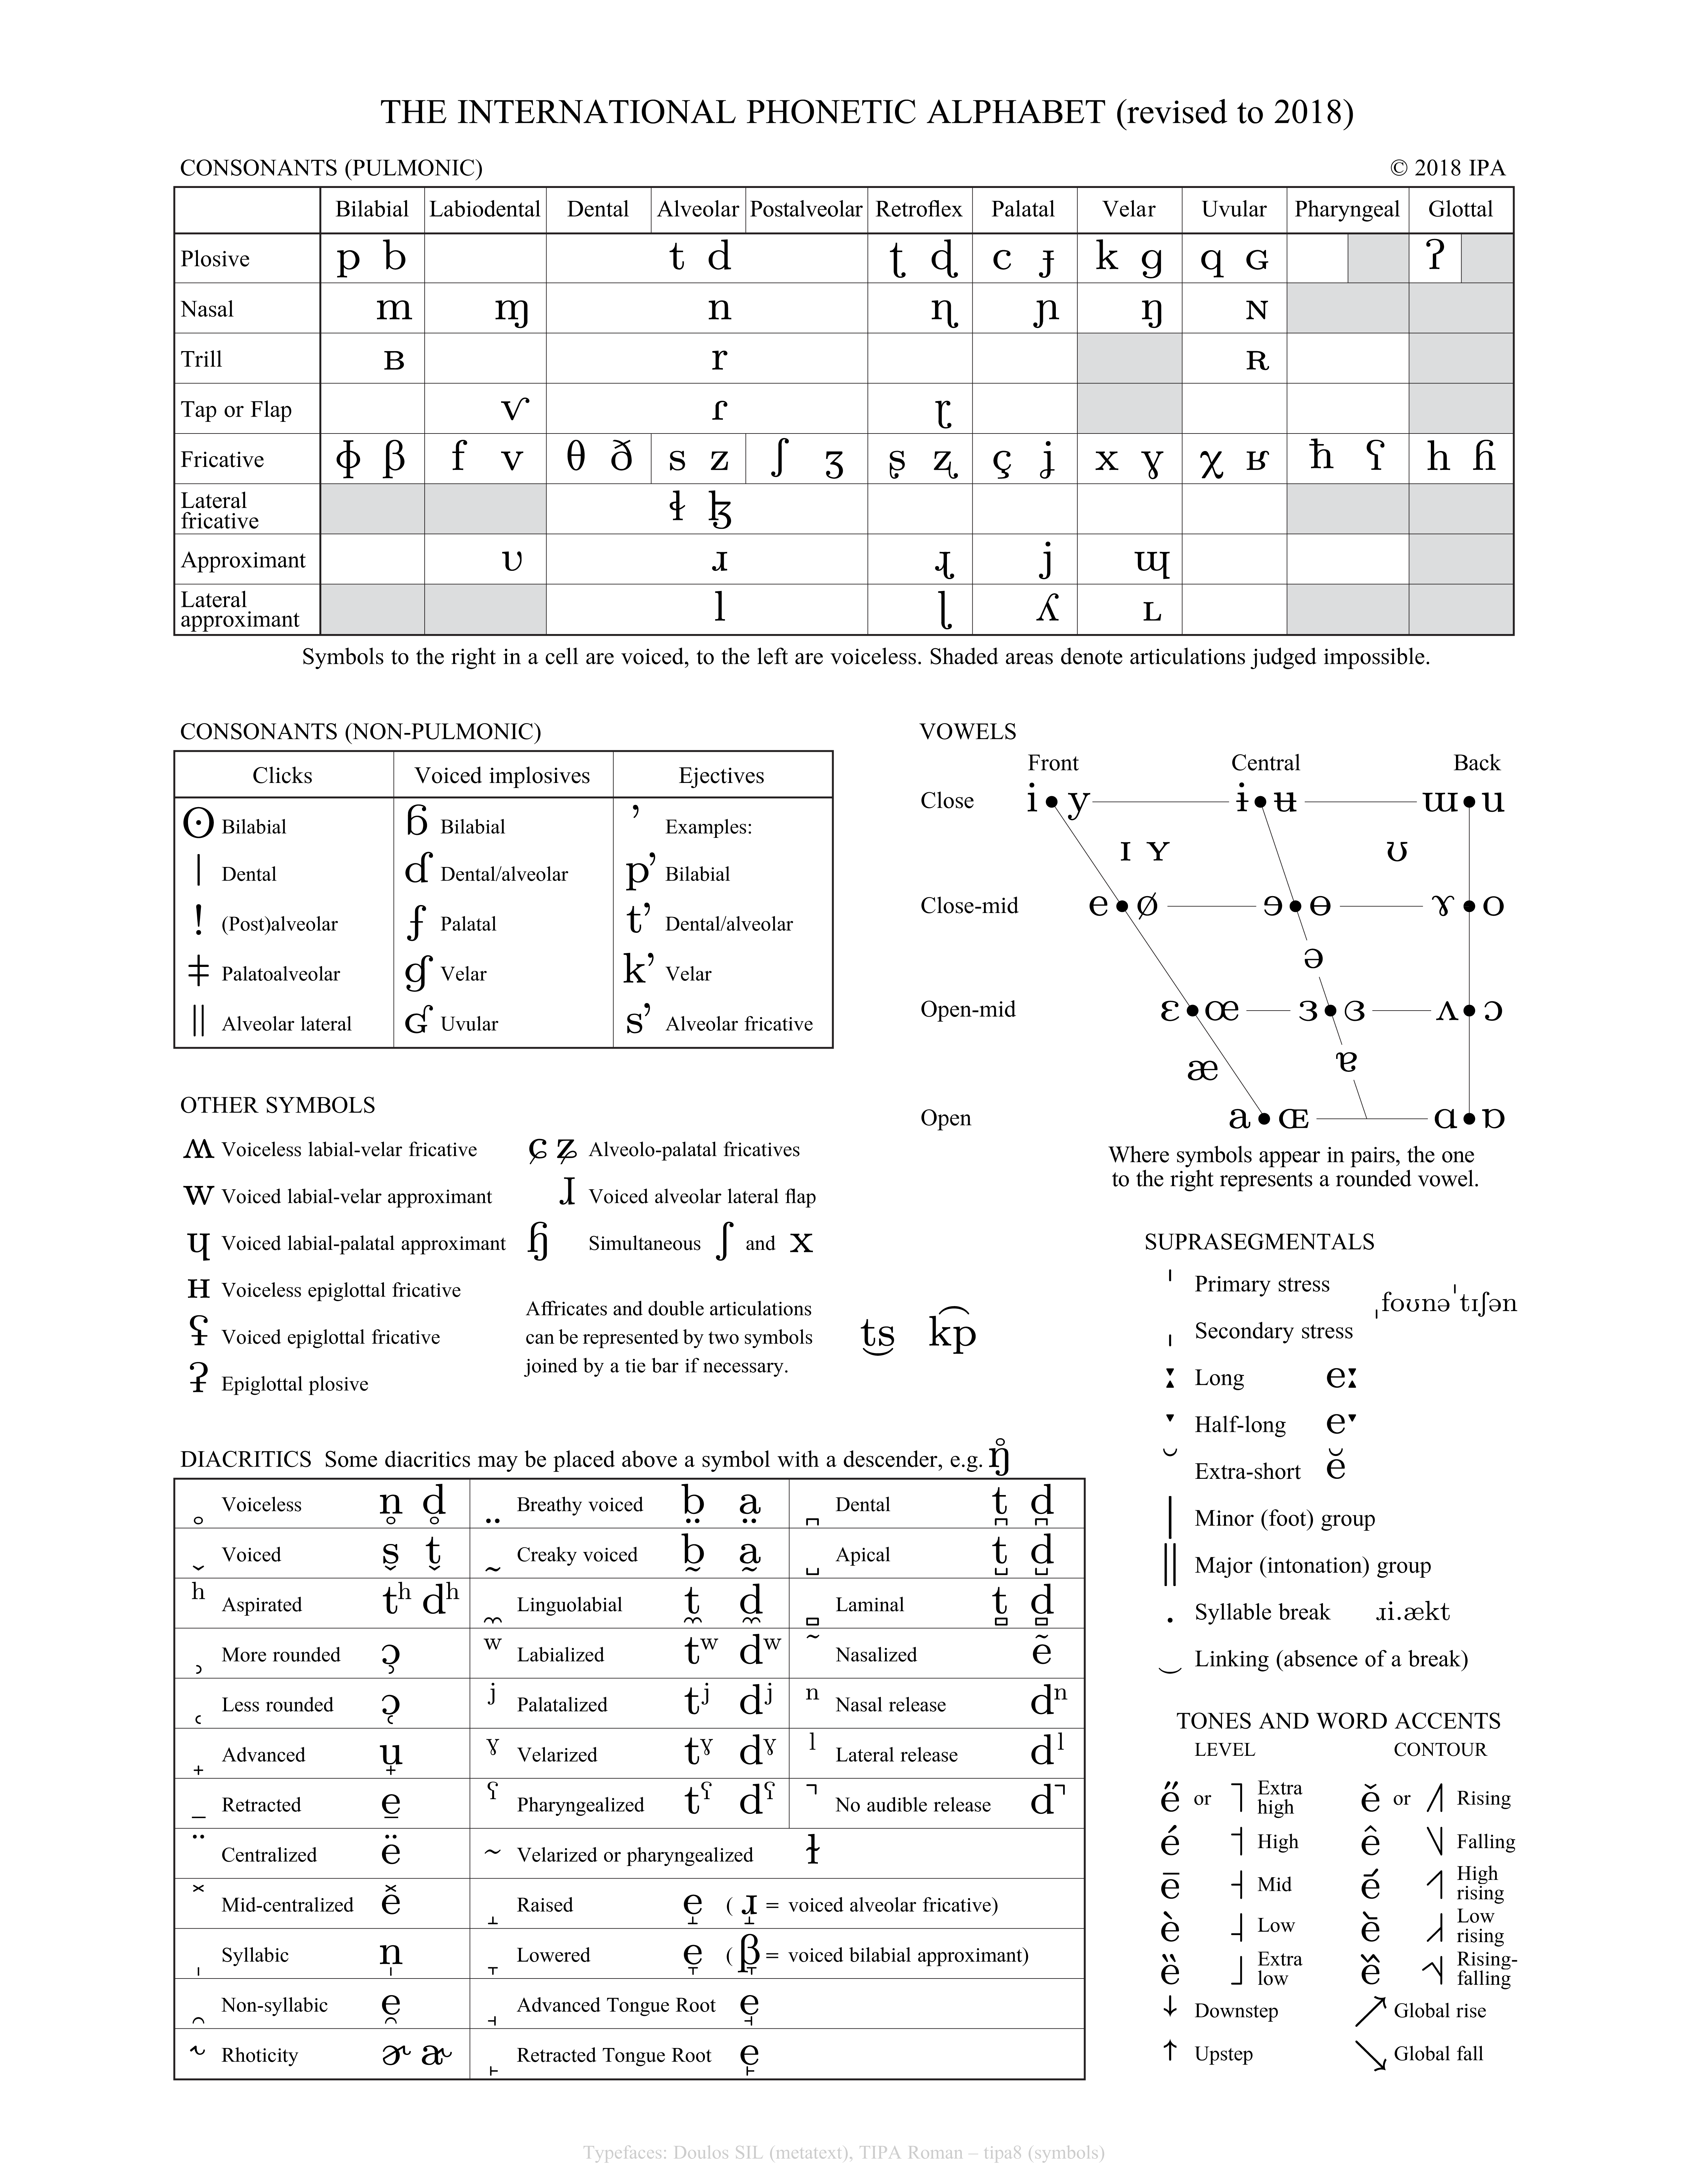
So first of all, how many symbols are we talking about? The most recent version of the IPA chart contains the following sounds:
Vowels and Consonants
- 18 pairs of voiceless/voiced pulmonic consonants, e.g. p and b (36 sounds in total)
- 23 voiced pulmonic consonants whose voiceless counterpart is represented with diacritic rather than a separate symbol, e.g. m and m̥
- 12 pairs of unrounded/rounded vowels, e.g. ɨ and ʉ (24 sounds in total)
- 4 additional vowels, e.g. æ
This makes for 59 pulmonic consonants and 28 vowels in total. To this we can also add:
- 15 non-pulmonic consonants, e.g. ʘ
- 10 “other symbols,” all of which are pulmonic consonants which don’t fit neatly into the main table, e.g. ʍ
Diacritics and stuff
- 31 diacritics, e.g e̊
- 9 suprasegmental markers, e.g. eː
- 14 tonal/word accent markers1, e.g. ↗
In total, that’s 166 distinct characters. Okay, how do we fit that on a keypad?
Keypads
A quick search for “programmable keypad” on Amazon turns up an apparently endless list of products.
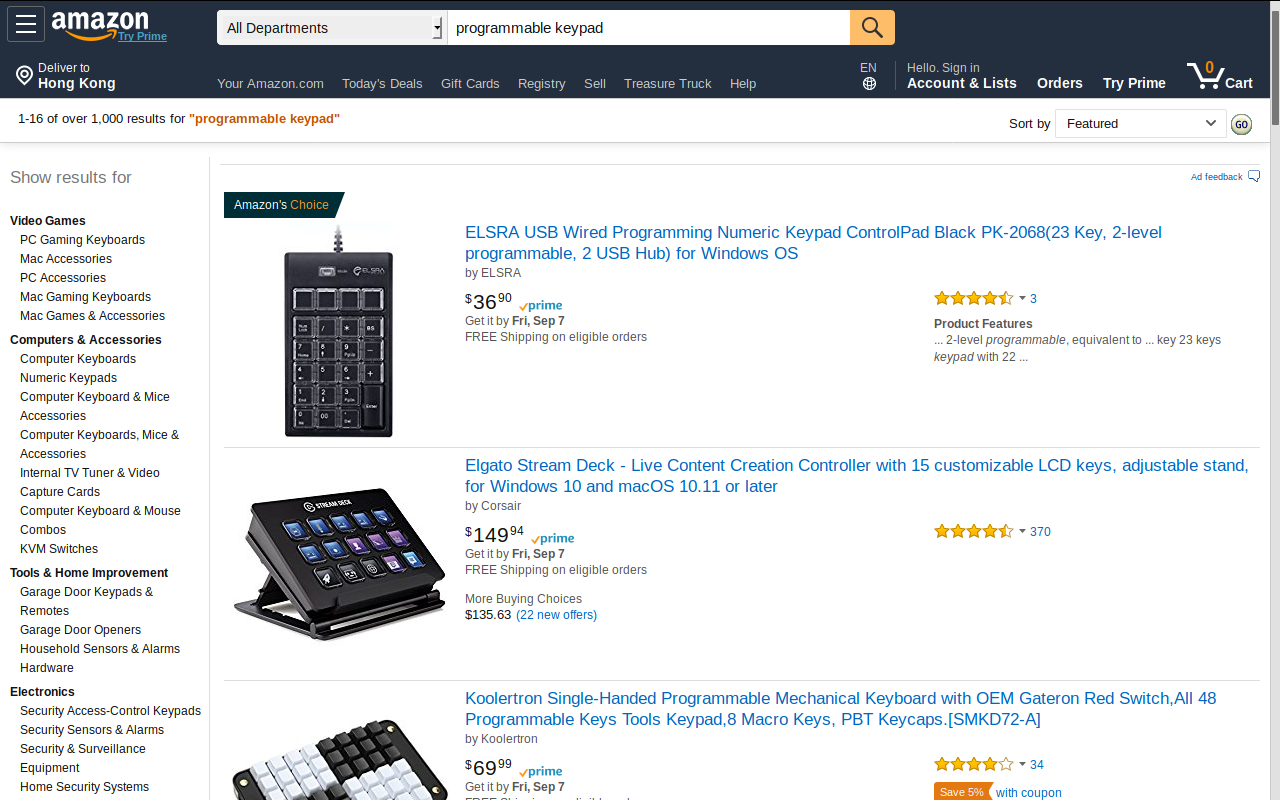
Sizes range from 15-26 keys on the smaller keypads, to around 48 on the mid-sized ones, to well over a hundred on the large boards.
Taking into account what will actually be on the keys, multiple symbols can be printed on each keycap, but anything more than three starts to get a little crowded. Even if I leave out some of the less common symbols and diacritics, there’s still more than a hundred to map. This means something with 24 keys, and therefore a maximum of 72 symbols, won’t quite cut it. A pad with 48 keys, on the other hand, is just about perfect. In the end I decided to go for this Koolertron model. Partly because the mechanical switches are easier to buy keycaps for, but more on this later.
The layout
The dimensions of the keypad offer some interesting design opportunities. For one, there’s no need to stick to a layout based on QWERTY, especially since it’s designed to be used with one hand. However, something intuitive is essential. For any given IPA symbol I should at least have a general idea of where it is on the pad.
To this end, my initial idea was to place pairs of voiceless/voiced consonants or unrounded/rounded vowels on the same key and have a shortcut key to represent voicing/rounding. But it wasn’t long before I realized this wasn’t going to work.
For a start, there would still be a third character to put somewhere on the key. And what would motivate this choice? Some sort of parallel organizing principle? What about the other eight keys which have neither a vowel nor consonant pair? While a nice idea, in practice a design like this creates more problems than it solves.
Grouping sounds: visual similarity vs. articulatory similarity
Taking a slightly different tack, I also had the idea to organize the keys based on the point of articulation of each sound. Here’s a crude mock-up of the kind of thing I had in mind.
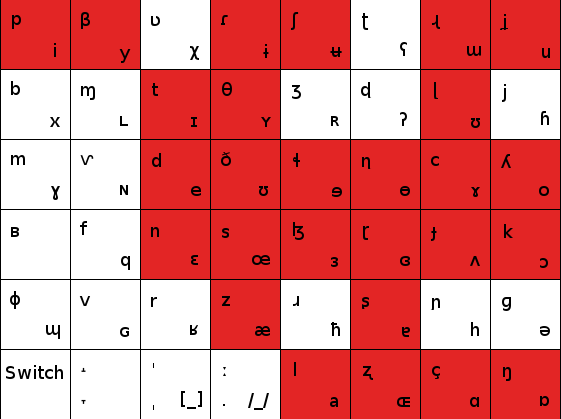
In the top left of each key is a pulmonic consonant. Starting with p in the top left of the board and moving top to bottom, each column contains consonants as the occur in the chart2 - starting with labial stops, then labial nasals, then labial trills and so on. Remember, this is only the consonant in the top left corner of each key. As there 59 pulmonic consonants in total, there are some leftovers. More on these in a minute.
On to the vowels! All of the red keys contain exactly one vowel in the bottom right corner. Collectively, these keys create the vowel-space trapezoid in the IPA chart. As you would expect, the vowels on the keys correspond to where they are produced in the vowel-space (though note schwa has been squeezed out to another key). I really, really like this trapezoid layout.
But now to return to the leftover consonants. Whereas the rest of the board corresponds to symbols’ placement in the IPA chart, and therefore where the sounds are produced in the mouth, there’s no rhyme or reason to the placement of the remaining consonants. They’re relegated to the any remaining space on the board.
If this layout sounds confusing, it’s because it is. The design is a messy, half-intuitive brainvom. One of those things that seems like a great idea, but quickly becomes a headache as you start to go through with it.
For this reason, my attention swtiched to a different approach - grouping symbols by how they look.
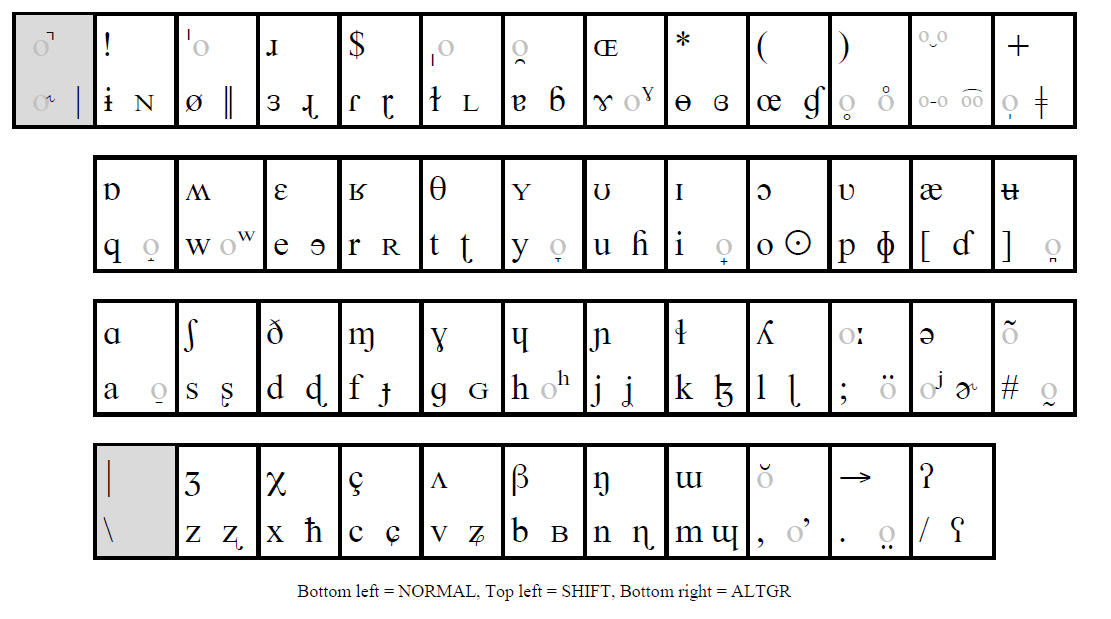
This appears to be approach taken by Mark Huckvale, whose IPA keyboard layout is pictured above. Things that look like go with other things that look like - <ɘ> and <ɛ>. When you’re looking up a character, you can probably visualize two things reasonably well: 1) what the character looks like and; 2) where a similar letter is on a QWERTY keyboard. Capitalizing on this, layouts organized by visual similarity make use of frequently-used pre-existing knowledge. Solid.
One downside of grouping things in this way is that you often can’t fit an entire cluster of similar symbols on the same key. For example, to the group of , <ɘ> and <ɛ> above we could also add <ə> and <ɜ>. Conversely, some symbols are just plain weird and don’t look much like anything else, like <ɸ>. Nevertheless, this is a minor drawback and the overall utility of the design more than makes up for it.
With this in mind, I decided to use this particular layout as the basis for my own design. Next stage: printing.
Designing and printing keycaps
As you can probably imagine, there’s not a huge market for custom printed keycaps. Actually, in all fairness, it’s larger than I’d thought, but not by much. If you’ve got a keyboard vanity project, Max Keyboard and WASD Keyboards are you’re best bet for custom keys. I chose WASD purely on a whim. No doubt Max Keyboard is great too. I just don’t have any experience with them.
WASD were super helpful guiding me through the process of designing the layout. They provide a vector template on their website, which can be edited fairly straightforwardly in Inkscape.
One thing I hadn’t anticipated when planning the keypad was the shape of the keys I’d need.

Because the keys on WASD’s keyboards have a sloped profile, like in the picture above, I needed to choose which shape I wanted. I opted for the R3s, mainly because they have the flattest profile, which should work well with the 8x6 slab. The keys are yet to arrive, so I’ll have to wait and see if my hunch was a good one.
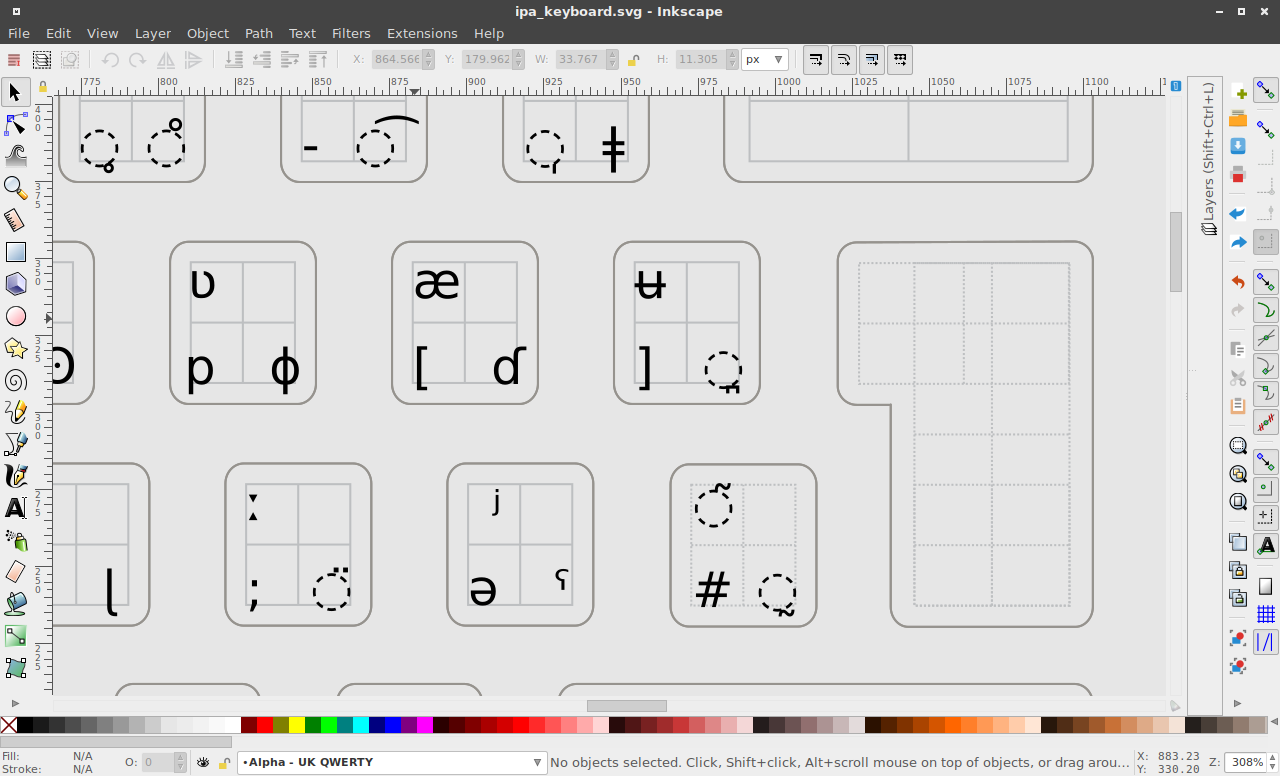
I wasn’t sure where it would fit in their pricing structure, given my request was an unusual one. I was half-expecting to have to sell off one of my kidneys, but it worked out to be very reasonable. Having a set of 48 keycaps printed only cost $45 USD. Had I asked WASD to do the design work that would have jumped to $95. Fortunately, the template they provide isn’t too hard to edit, especially since I was just sticking a bunch of Unicode characters into a grid. Hooks, descenders and other IPA craziness, complicated things a little, though not substantially. Here’s a pic of the finished design.
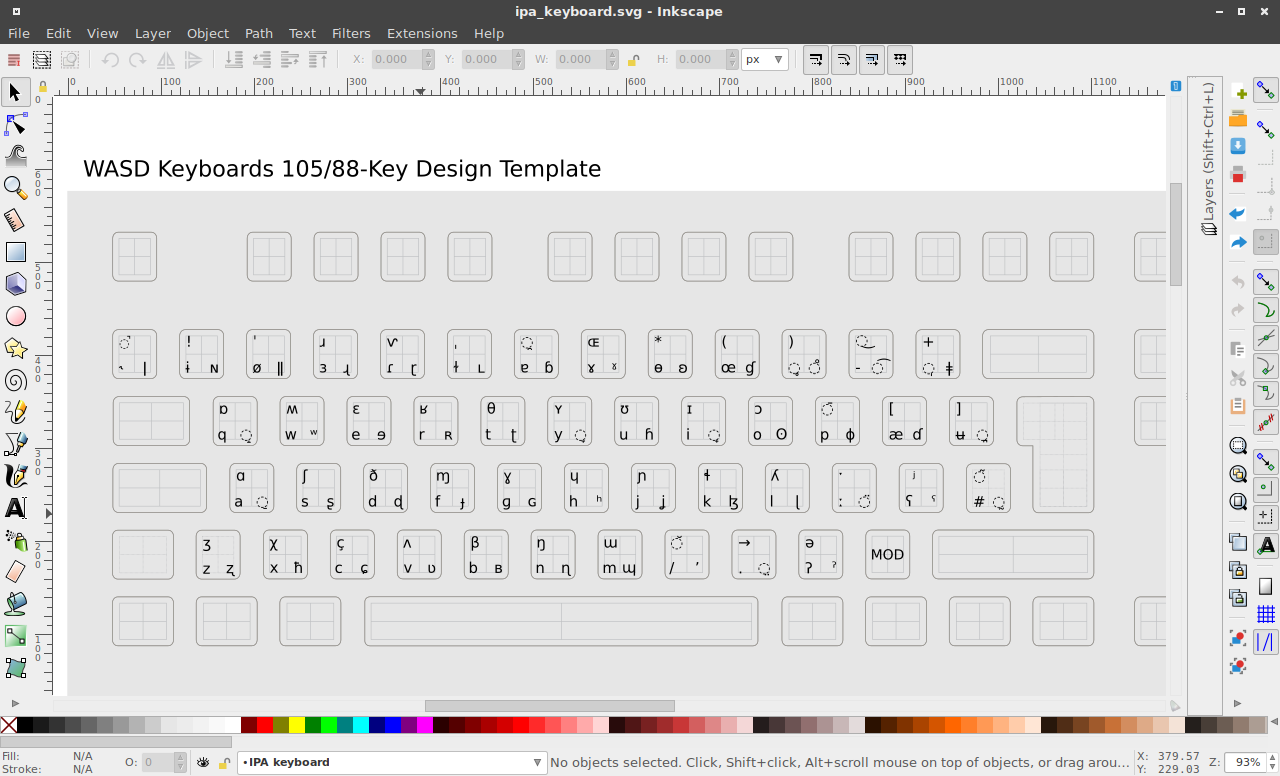
Although very similar to the Mark Huckvale’s layout, I’ve changed keys here and there. His layout contained some redundant punctuation and couple of unexpected character choices (like ɚ) which I could cut out and and replace with more symbols and diacritics. The end result captures most of the IPA chart in a fairly small footprint.
As for exactly how the keys will be arranged on the pad, I’m not sure yet. I’d like to keep it QWERTYish, but I’ve got some freedom for the keys which have only diacritics/punctuation. Some testing should iron out the kinks.
For now I just need to sit tight and wait for my board and caps to arrive…
Next steps
- Assembly
- Programming
- Testing
Part 4 - Putting it all together
-
Technically there are 24 symbols here, as there are two ways representing both tonal height and contour. For example, either a macron ‘ō’ or ‘˧’ can be used to represent a mid level tone. ↩︎
-
You might notice that in the middle of the board the order gets a little mixed up. No real reason for this, just absentmindedness on my part. ↩︎